


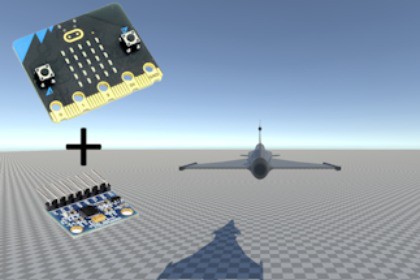
How you can use a Accelerometer and Gyroscope to make a GameObject move in Unity via Serial COM port and Wireless.Instruction:Hardware Instruction WirelessLet's explore how to connect the MPU6050 sensor to a micro:bit V2 microcontroller and how to program.Micro:bit A:1. Connect the MPU6050 GND pin to the microbit GND pin.2. Connect the MPU6050 VCC pin to the microbit VCC pin.3. Connect the MPU6050 serial data pin (SDA) to microbit pin 20.4. Connect the MPU6050 serial clock pin (SCL) to microbit pin 19.Software InstructionYou find all the files in the Folder "Microbit files" in Unity.Let’s start programming the Micro:bit V2 to utilize the SEN-MPU6050 sensor:1. Connect the Micro:bit A to your computer via USB. The Micro:bit should show up in the Explorer window.2. Drag and drop the HEX-file (microbit-Microbit_serial_unity_radio_send.hex) directly to your Micro:bit A in the Explorer window. After a short perod of time you Micro:bit A is programmed.3. Now disconnect your Micro:bit A and connect Micro:bit B via USB.4. Program this Micro:bit B in the same way, but use the file: microbit-Microbit_serial_unity_radio_recive.hexNow both of your Micro:bits is ready to run.Micro:bit A with battery pack and Micro:bit B connected to the computer via a USB cable.Hardware Instruction WiredLet's explore how to connect the MPU6050 sensor to a micro:bit V2 microcontroller and how to program.Micro:bit:1. Connect the MPU6050 GND pin to the microbit GND pin.2. Connect the MPU6050 VCC pin to the microbit VCC pin.3. Connect the MPU6050 serial data pin (SDA) to microbit pin 20.4. Connect the MPU6050 serial clock pin (SCL) to microbit pin 19.Software InstructionYou find all the files in the Folder "Microbit files" in Unity.Let’s start programming the Micro:bit V2 to utilize the SEN-MPU6050 sensor:1. Connect the Micro:bit to your computer via USB. The Micro:bit should show up in the Explorer window.2. Drag and drop the HEX-file (microbit-Microbit_serial_unity.hex) directly to your Micro:bit in the Explorer window. After a short perod of time you Micro:bit is programmed.Let the Micro:bit be connected to the computer via a USB cable.Unity Instruction1. Open the Unity file “Microbit SEN-MPU6050” and open the scene “SampleScene”.2. In the Asset folder you find the Micro:bit V2 files and a PDF with instructions.3. Go to Edit/Project Settings/Playes and scroll down to this: Make sure to use, .NET Framework and Input Manager (Old)4. Make sure to use the right “Port Name” in the Inspector window. Here you can change which object to move with your Micro:bit. Just choose a Gameobject in “Plane To Rotate”.5. Now, when you hit Play your Micro:bit V2 starts to send the X, Y from the Micro:bits accelerometers and the Z from the SEN-MPU6050-gyro.6. In the Console window you can see the values and the Aircraft in the scene moves like your hardware setup moves.Micro:bit V2 instructionCalibrate the GYRO:Put the Micro:bit and the Gyro on a flat surface.Push Button B.Now the GYRO will calibrate for 10 seconds.Optional:1. Login to https://makecode.microbit.org/ using your account.2. Create a new project by clicking the "New Project" button. You may name it anything you want, I suggest to name it with a descriptive name such as "gyro-mpu6050-test".3. Click the "Extensions" block just under the "Math" block.4. Type “SEN-MPU6050” on the search bar.5. Select the "SEN-MPU6050" from the search results. The "SEN-MPU6050" block should appear in the Menu.6. Drag and Drop the “microbit-Microbit_serial_unity.hex” file to the working area of MakeCode. Now the blocks or Javascript is seen. This is if you want to see or edit the code before creating a new HEX-file. When you save this, a new HEX-file is created in your chosen directory. Just drag and drop this file to your Micro:bit V2 as I described under point 2 above.Optional:Download ARDUINO https://www.arduino.cc/en/software, nice to have and an easy way of viewing COM-ports and to view the Serial monitor, so you can see what's actually being sent from your Micro:bit V2.It’s important that the Arduino is not running or a web-page with MakeCode is open. Seems to interfere with the serial outputBBC micro:bit V2Cables to connect the Microbit with the MPU6050SEN-MPU6050 GyroUSB-cableOptional:Arduino software and MakeCode for editing code or viewing the Accelerometer and Gyroscope values.