


Ready-to-use Multiplayer Lobby System built
with Photon Fusion 2. Save weeks of setup time
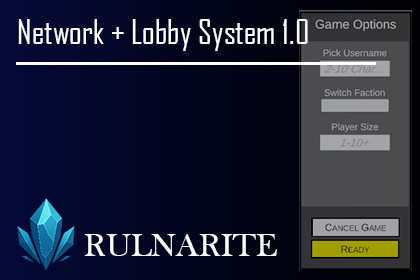
with a clean, customizable networking foundation. Set Max Player Size, Switch Sides, and more.A clean, ready-to-use Multiplayer Lobby System built with Photon Fusion 2 for Unity 6.Stop spending weeks building multiplayer infrastructure. Drop this into your project and focus on your game!WHAT'S INCLUDEDA Host/Client Mode Networking System made with Photon FusionCustomizable lobby size (1-10+ players)Red vs Blue faction switchingCoop and PvP ready (1v1, 4v4, 8v8, and more, adjust as you wish)Synced player prefab with username displayJoin code system for instant session sharingTwo demo scenes includedFull setup documentationBEST FOR Developers building any multiplayer game requiring a PvP/Co-op-based and join code-based lobby structure.Simple Network Setup + Lobby System 1.0=======================================IMPORTANT - READ FIRST:- You need to Download Photon Fusion Package from Unity Asset Store Yourself -- Expect Errors if you import my package before you import Photon's Own Package. The Errors should disappear once you import Photon Fusion's own Package.- If you Do not have Demo Scenes in the Build Settings, it will not run unless you copy logic to your own scenes.- You need to have a photon fusion account and created an app (explained below) on the website, then copy your app id to paste on Fusion Hub in Unity- Naming Conventions of the UI game objects are important for network manager to bind them again. Check the script NetworkManagerLobby.cs for more info on that. You can change the names but you need to change the string names accordingly.REQUIREMENTS- Unity 6000.0.8f1- Photon Fusion 2.0.12DEPENDENCIES- Photon Fusion package (available on Unity Asset Store)- Active Photon account with a Fusion App IDSETUP (Skip to 4 if you have photon fusion setup already)1. Create a Photon account at photonengine.com if you don't have one2. Create a new app — select Multiplayer Game, SDK Version: Fusion 23. Download Photon Fusion 2 from the Unity Asset Store4. Copy your App ID from the Photon Dashboard5. Import the package into your Unity project Assets folder6. Paste your App ID into the Fusion settings inside Unity7. Add all demo scenes to Build Settings (File > Build Settings > Add Open Scenes)8. Press Play on the Lobby scene to testSCENES INCLUDED:1. Main Scene2. GameplayKNOWN LIMITATIONS- Requires active internet connection- Tested on Unity 6000.0.8f1 only- Player Connection is Done Via a Generated Join Code- Player Prefab is for Demo. Movement and Mechanics not Included except Player Username and Player Object Syncing- If you are using Unity 3D, you will need to replace the placeholder sprite with your relevant models. - Also, you can add your NetworkAnimator, NetworkRigidbody, etc., based on your game logic. They are not added to the setup.FEATURES- Customizable lobby player size (1-10+ players)- Faction system — players switch between Red and Blue teams (faction names are customizable)- Supports Coop and PvP formats (1v1, 4v4, 8v8, etc.)- Player prefab with synced username tag and transform- Join code system for easy session sharing- Host and client architecture includedSUPPORTmindentertainmentco@gmail.comAI tools (GitHub Copilot) were used to assist in refactoring, cleaning, and documenting code during development. All logic, architecture, and systems were human-designed and manually reviewed.